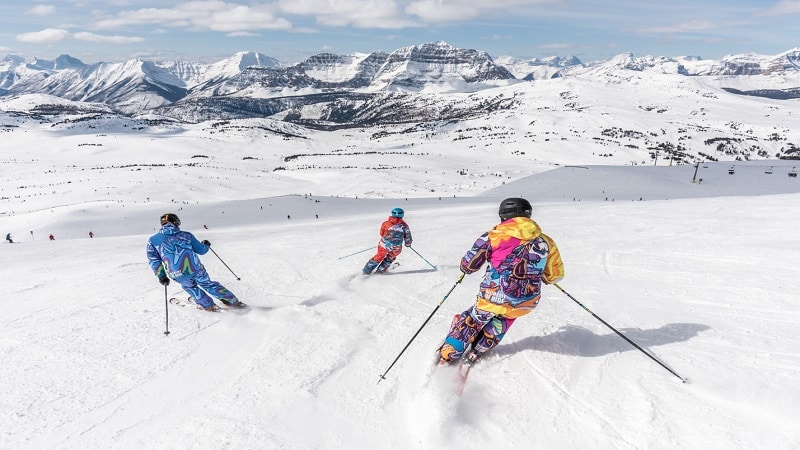
Imagine you wake up to a fresh blanket of snow outside your window. The perfect opportunity for some fun in the winter wonderland! But wait, you don’t have a sled. Don’t worry, we’ve got you covered. In this article, we’ll show you how to make a makeshift sled using items you probably already have at home. Get ready for an exhilarating ride down those snowy hills!
Who says you need fancy equipment to enjoy the snowy slopes? With a little creativity and resourcefulness, you can make your very own sled. In this article, we’ll walk you through the step-by-step process of creating a makeshift sled using everyday materials. Get ready to embrace your inner engineer and have a blast in the snow!
Materials Needed
Now that you’re ready to embrace your inner engineer and create your very own makeshift sled, let’s gather the materials you’ll need to bring your snowy adventure to life. Don’t worry, you don’t need fancy equipment or expensive gear. Just a few everyday items and a sprinkle of creativity will do the trick!
Here’s a list of materials you’ll need:
- Cardboard: Find a sturdy cardboard box or thick pieces of cardboard. This will serve as the base of your sled, providing stability and support as you glide through the snow.
- Duct tape: Ah, the handyman’s best friend! Use duct tape to secure the cardboard pieces together. It’s strong, durable, and will hold your sled intact during thrilling rides down the hill.
- Scissors: You’ll need a good pair of scissors to cut the cardboard into the desired shape for your sled. Be careful not to accidentally snip your fingers while you’re at it!
- Rope: A sturdy rope will come in handy for pulling your sled uphill or for tying it securely to a tree before taking off on your snowy adventure. Make sure it’s long enough to comfortably hold onto as you glide.
- Old shower curtains or garbage bags: This may sound strange, but using old shower curtains or garbage bags as a protective layer on top of your cardboard sled will help reduce friction and make your ride smoother. It’s like adding a secret ingredient to your sled-building recipe!
Remember, the key to creating a successful makeshift sled is to be resourceful and use what you already have. Improvise if needed, as long as it’s safe and doesn’t compromise your fun in the snow!
Step 1: Finding the Right Surface
When it comes to making a makeshift sled, finding the right surface is key to having an epic ride down the slopes. As an avid snow sports enthusiast, you know that the surface you choose can make or break your sledding adventure. So, let’s dive into finding that perfect surface for your makeshift sled!
First things first, look for a hill that is steep enough to provide a thrilling ride, but not too steep that you’ll launch off into the unknown. A gentle slope might be fun for a leisurely ride, but if you’re looking for an adrenaline rush, opt for a steeper hill. It’s all about finding that balance between excitement and safety.
Let’s talk about the surface itself. Freshly fallen snow is ideal for sledding as it provides a smooth and slippery ride. The soft texture of the snow will cushion your sled and make the ride more comfortable. If the snow is a bit hard or icy, don’t worry! You can still have a great time, but just be cautious of any potential bumps or patches of ice.
Another option for a sled surface is packed snow or groomed slopes. These are often found at ski resorts or popular sledding areas. Packed snow can be more compact and provide a faster ride, but it might also be a bit bumpier. Just be prepared for a wilder adventure if you choose this type of surface.
If you can’t find a hill with enough snow or don’t have access to packed snow, don’t lose hope! You can still enjoy sledding on alternative surfaces like grass-covered slopes or even sand dunes if you’re lucky enough to be near a beach. Just keep in mind that the experience may be slightly different, and you might want to adjust your sled accordingly.
Step 2: Choosing the Right Material for the Base
Now that you’ve found the perfect spot to sled, it’s time to focus on the base of your makeshift sled. Choosing the right material is crucial for a smooth and enjoyable ride. As an avid snow sports enthusiast, you know that the base can make all the difference in how your sled performs on different surfaces.
Here are some options to consider when selecting the material for your sled’s base:
- Plastic:
- Cardboard:
- Inflatable Rafts or Tubes:
- Repurposed Materials:
Remember, the material you choose will depend on the surface you plan to sled on. Different materials may perform better on snow, grass, or even sand dunes. Consider the conditions, your desired speed, and the level of comfort you want for your sledding adventure.
Now that you have an idea of the different base materials to choose from, let’s move on to the next step – adding handles for better control and maneuverability.
Step 3: Attaching Handles or Ropes
Now that you’ve chosen the perfect base material for your makeshift sled, it’s time to add handles or ropes to ensure a secure grip and easy maneuverability as you fly down the slopes. As an avid snow sports enthusiast, you know how crucial it is to have a sturdy and reliable way to control your sled.
There are a few options for attaching handles or ropes to your sled, depending on the materials you have on hand and your personal preference. Here are some popular methods:
- Rope Handles: One of the simplest and most effective options is to attach rope handles on the sides of your sled. Measure and cut two lengths of sturdy rope, approximately 1-2 feet long each. Then, using a heavy-duty stapler or strong adhesive, secure the ends of the ropes to the sides of the sled. Make sure they are positioned at a comfortable distance apart, allowing you to grip them firmly while sledding.
- Screw-in Handles: If you have access to a drill, you can use screw-in handles for a more secure attachment. Purchase a pair of handles designed for winter sports equipment or repurpose handles from old sleds or ski poles. Mark the desired location for the handles on the sides of your sled and carefully drill pilot holes. Then, screw in the handles tightly, ensuring they are stable and won’t come loose while in use.
- Duct Tape Grips: In a pinch, you can create makeshift handles using duct tape. Cut lengths of duct tape, about 1 foot long each, and fold them in half lengthwise to create a sturdy grip. Position the folded tape on the sides of your sled and wrap additional tape around it to secure it in place. While not as durable as rope or screw-in handles, this method can work well for a temporary sled.
Remember, the handles or ropes you choose should be securely attached to the sled and allow you to maintain control while zooming down the hill. Take the time to ensure they are firmly in place before hitting the slopes. Now that you’ve completed this step, you’re ready for the final touch to make your makeshift sled ready for some outdoor winter fun.
Step 4: Adding Padding and Cushioning
When it comes to sledding, safety should always be a top priority. Adding padding and cushioning to your makeshift sled can help protect you from any bumps or jolts as you slide down the hill. Plus, it can make your overall sledding experience much more comfortable and enjoyable. So, let’s dive into the world of padding!
1. Foam Mats
One of the easiest and most accessible options for padding your sled is to use foam mats. These mats are often used for exercise or play areas and can easily be found at sporting goods stores or online. Simply measure the dimensions of your sled base and cut the foam mats accordingly. Then, attach them securely to the base using heavy-duty adhesive or even duct tape. Not only will the foam provide cushioning, but it will also add a layer of insulation to keep you warmer during those chilly sledding sessions.
2. Old Pillows or Cushions
If you have some old pillows or cushions lying around, don’t toss them out just yet – put them to good use on your sled! Place them on the base of your sled, securing them tightly with bungee cords or straps. Not only will this provide extra padding, but it will also give you a soft and cozy ride down the hill.
3. Inflatable Pool Floats
If you’re feeling a bit more adventurous, why not try using inflatable pool floats as padding? These floats are designed to be comfortable and can add a fun twist to your sled. Simply inflate the floats and attach them to the base of your sled using strong adhesive or zip ties. Be sure to choose floats with a non-slip surface to prevent any sliding off the sled.
Remember, the key is to ensure that the padding is securely attached to the sled to avoid any mishaps. You don’t want the padding to come loose while you’re in the middle of a thrilling ride! So, make sure to test the attachments before hitting the slopes.
Step 5: Testing and Making Adjustments
Now that you’ve put together your makeshift sled, it’s time to take it for a spin and see how it performs on the snowy slopes. Testing your sled will allow you to make any necessary adjustments to ensure that it gives you the best possible ride. As an avid snow sports enthusiast, you know that finding the right balance and making tweaks can make all the difference.
First, find a suitable hill or slope to test your sled on. Look for a spot with a gentle incline and enough space to maneuver safely. It’s important to choose a location that is free of obstacles and away from any potential hazards.
Next, position yourself on the sled and get ready to launch. As you push off, pay close attention to how the sled handles the terrain. Does it glide smoothly or do you experience any bumps or wobbles? Note any areas that may need improvement or adjustment.
If you find that your sled isn’t performing as you had hoped, don’t be discouraged. Making small adjustments can often enhance your sled’s performance. Some common tweaks you can make include:
- Adjusting the weight distribution: Experiment with shifting your body weight forward, backward, or to the sides to find the optimal position for balance and control.
- Adding more padding: If you feel discomfort or experience excessive bumps, consider adding more padding to enhance your comfort and absorb impact. Foam mats, old pillows, or inflatable pool floats can work well for this purpose.
- Improving traction: If you find that your sled is not gripping the snow well, try adding some extra grip to the base. You can do this by attaching some adhesive grip strips or even using duct tape strategically placed for better traction.
Conclusion
Now that you have the step-by-step guide on how to make a makeshift sled, you are ready to hit the slopes! Remember to find a suitable surface for sledding and choose the right material for the base of your sled. Attach handles or ropes using rope handles, screw-in handles, or duct tape grips for added control. Don’t forget to add padding and cushioning for safety and comfort, using foam mats, old pillows or cushions, or inflatable pool floats. Make sure to securely attach the padding to prevent any accidents.
Once your sled is ready, it’s time to test it out and make any necessary adjustments. Experiment with weight distribution, add more padding if needed, or improve traction for better performance. With a little creativity and resourcefulness, you can create a makeshift sled that will provide hours of fun in the winter snow. So grab your materials, get out there, and enjoy the thrill of sledding down the hills!


